Adding a Custom DIY Framed Mirror to Your Bathroom
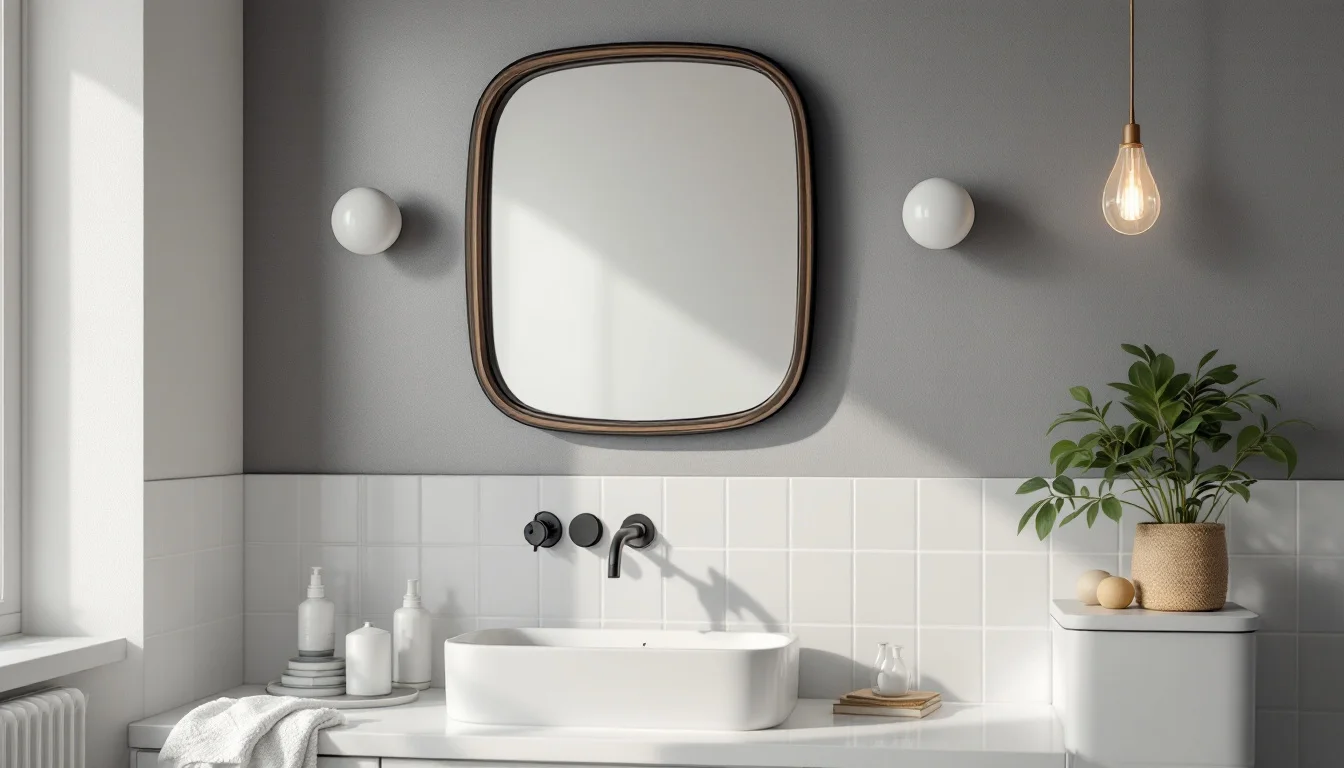
The eye is naturally drawn to the mirror when entering a bathroom. In a small washroom, it captures light and visually expands the space. As specialized brand Roca points out, the mirror plays a central role in asserting the room's style through its shape, size, and frame. However, a plain sheet of glass with raw edges can feel unfinished, and replacing it entirely is a significant investment.
Fortunately, adding a custom border to an existing mirror yourself is an achievable project that can modernize the space and turn it into a true decorative piece, provided you follow a few strict rules. In an environment subject to intense thermal and humidity variations, your choice of primers and sealing methods will determine the durability of your work.
Key Takeaways
Before you start transforming your space, here are the essential things to keep in mind to ensure this DIY project is a success:
- Clear financial advantage: Framing an existing bathroom mirror yourself can be done for under €20, whereas a new mirror would cost around €100, according to Maison & Travaux magazine.
- Cutting precision: The assembly requires clean 45° miter cuts to ensure perfect corners.
- Moisture protection: Sanding and applying a waterproof coating must absolutely be done prior to installation.
- Clamped drying: Holding the frame in place with masking tape takes about 48 hours to ensure the glue fully cures—the exact time depends on the product used; check the manufacturer's instructions.
- Safe drilling: Installing wall anchors in tile requires a specific drill bit and turning off the hammer function on your drill to protect the integrity of the ceramic.
Budget and Ecology: Why frame an existing mirror instead of buying a new one?
The hesitation between renovating existing equipment and buying a new product is often resolved by a simple cost analysis.
Comparing Design Solutions
To evaluate the best option, here is a comparison of three common approaches:
| Market Options | Estimated Budget | Technical Complexity | Ecological Impact |
|---|---|---|---|
| 100% DIY Frame (molding) | Under €20 | Moderate (requires cutting) | Very low (reuses glass) |
| Ready-to-install custom kit | Around €90 | Low (simple assembly) | Low (keeps glass) |
| Standard new mirror | Around €100 | Moderate (removal and drilling) | High (replacement) |
The Financial Side
Starting with simple molding sold by the meter is much cheaper than a custom kit (often priced around €90). The raw materials are highly affordable: expect to spend about €9 on wood to frame a standard mirror. Factoring in the various mounting and protective supplies, the overall savings compared to buying new can be substantial, provided you already own the basic tools. A trip to a home improvement store or an online marketplace like ManoMano is all it takes to gather the necessities. Plus, most of the tools used can be repurposed for other home projects, which offsets the true cost of the job.
Environmental Impact
Beyond the obvious savings, this approach is part of a waste reduction mindset. Keeping your existing mirror prevents the extraction of new raw materials and minimizes the carbon footprint associated with shipping a heavy, fragile piece of furniture.
Materials and Design: Which frame can withstand the moisture challenge?
The aesthetics of your washroom will depend entirely on the material selected for the frame. However, in an atmosphere often saturated with steam, the material's durability takes precedence over its visual appeal alone.
Customization Options
According to the specialist website Masalledebain.com, your choice of frame material depends on your desired style:
- Solid or engineered wood: Wooden frames create a warm, rustic atmosphere. However, solid or engineered wood requires rigorous preparation.
- PVC: PVC molding is an accessible basic option for homemade frames, as it is completely waterproof.
- Metal profiles: A metal frame offers a more modern, sleek look, perfect for an industrial or minimalist style. Anodized aluminum or stainless steel are preferred to avoid any corrosion.
Essential Fiber Protection
If you choose the wood molding route, waterproofing is not optional. It is recommended to apply a marine varnish or a special damp-room paint on the exposed surfaces. Be sure to avoid treating the gluing areas on the back to prevent interfering with the adhesive's grip, or use a specific primer compatible with your chosen glue. This waterproof barrier will minimize the risk of the material swelling or warping from daily condensation.
Technical note: In a bathroom, the areas immediately next to the shower or bathtub are subjected to direct water splashes. In these setups (known as "wet zones"), a wooden frame—even a treated one—remains vulnerable to accelerated wear and tear; PVC or anodized aluminum will be far more durable choices.
Step-by-Step Tutorial: Adapting your DIY project for a damp room
In a bathroom, your framing approach must keep water from seeping in. Here is the detailed method to ensure a long-lasting result using standard tools (tape measure, pencil, spirit level, saw).
Step 1: Careful Preparation of the Surface
The adhesive's grip depends on the cleanliness of the surface. To optimize the frame's hold, you first need to thoroughly clean the mirror with glass cleaner or a mixture of white vinegar and dish soap, then wipe it down with a lint-free microfiber cloth to remove all traces of moisture and dust. The vinegar dissolves limescale while the dish soap cuts through grease. If you decide to do this work flat, take the mirror down and place it on a level surface protected by newspaper or an old piece of fabric.
Step 2: Measuring and Miter Cutting
The method involves precisely measuring the mirror with a tape measure, transferring the dimensions to the molding with a pencil, and planning out 45° cuts using a miter saw or miter box. At this stage, it is crucial to properly account for the mirror's initial shape (rectangular, square, round, or oval).
Once cut, the edges of the trim should be lightly sanded, and then the pieces painted or stained before installation.
Step 3: Gluing and Final Sealing
- Apply the adhesive: Install the frame by applying glue to the back of each piece or on the frame's inner edge. Be sure to use a glue specifically formulated for damp environments and compatible with glass; always consult the manufacturer's technical data sheets for the application technique (dots, waves, or a continuous bead) and curing times.
- Position the pieces: Glue the bottom part first to create a supportive base, then the sides and the top, after rigorously checking the horizontal and vertical levels with a spirit level.
- Clamp it down: It is imperative to hold everything in place with masking tape for the time specified by the glue manufacturer (around 48 hours for most common products), until fully set.
- Seal the perimeter: Wait for a complete cure. Then, apply a thin bead of sanitary silicone sealant all the way around the frame and smooth it out.
Limitations and Precautions
This project does come with a few challenges. Making clean 45° cuts requires precision. Furthermore, an imperfect perimeter seal risks letting moisture seep behind your creation, which can ultimately damage the material or the silvering of the glass.
Wall Mounting: How to hang the mirror without destroying your tile
If your mirror isn't already mounted and you need to hang it up, caution is required so you don't crack the bathroom's wall covering, which is often lined with ceramic or porcelain tile.
Safely Drilling Through Tile
If the wall needs to be drilled and the surface is tiled, you must apply a piece of masking tape over the drilling spots, equip yourself with a specialty tile drill bit (carbide-tipped or diamond core), and turn off the hammer mode on your drill to avoid cracking the ceramic tiles. It is advisable to drill at a moderate speed without forcing it.
Non-Destructive Alternatives
Many renters aren't allowed to put holes in the walls. Once the frame is finished, the mirror can be hung on existing hooks, or mounted without drilling using double-sided mounting tape or construction adhesive. For a less permanent assembly method between the frame and the glass itself, it is also possible to attach mirror clips to the back of the mirror and the frame.
Mind the weight: The load-bearing capacity of double-sided tape or construction adhesive is limited and depends on the chosen product and the nature of the surface. You must strictly adhere to the maximum loads indicated by the manufacturer. For a large mirror or one weighing more than a few kilograms, mounting with anchors and screws remains the most reliable solution.
Frequently Asked Questions (FAQ): Practical Details
Why do black spots appear on some mirrors?
The degradation or chemical corrosion of the metallic layer that makes up the silvering causes irreversible black spots. In a damp room, the framing approach must prevent water from seeping behind the panel, which is why applying a sanitary silicone perimeter seal is so important.Do I need to take the mirror down for this project?
No, it isn't mandatory. If your current setup is solidly glued flush to the wall, you can assemble and glue the prepared trim directly over the edges. This simply requires properly protecting the surrounding surfaces when applying the final seal.Conclusion: An Aesthetic Upgrade
Renovating a bathroom doesn't always have to involve astronomical expenses. By adding a structured finish to glass with raw edges, you transform a simple utilitarian object into a true piece of furniture—akin to a painting hung above the vanity—all without having to touch the plumbing. This level of finish alters the overall perception of the space, giving it a polished look. These targeted improvements, which combine technical ingenuity with cost control, allow you to limit waste while completely refreshing the room's atmosphere.