Maximizing Under-Stair Storage
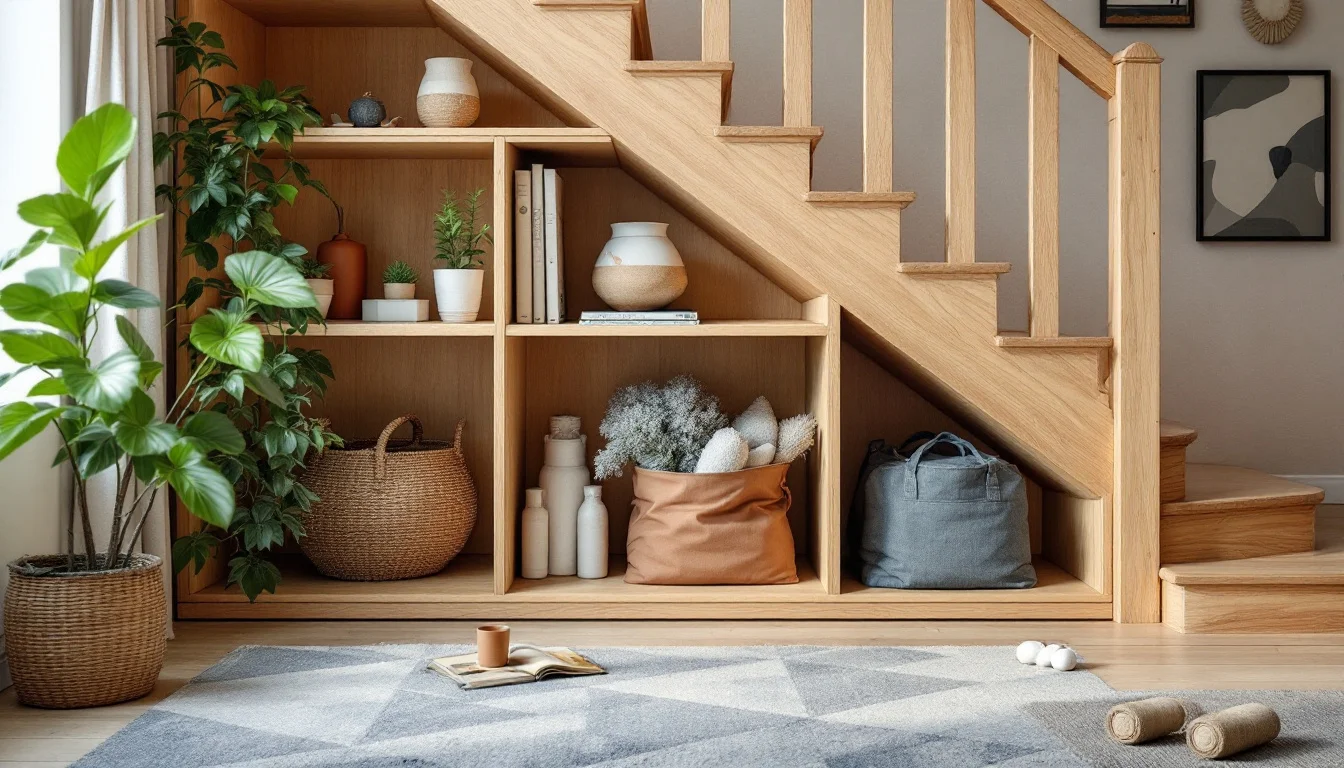
The interior architecture of our homes often leaves pockets of unused space, with the area beneath the stairs presenting a classic design challenge. Interior design guides frequently highlight this under-stair alcove as the ideal spot for a built-in closet. In many households, it becomes the go-to storage area for everyday essentials like cleaning supplies, pantry items, and the vacuum cleaner.
However, enclosing this awkwardly shaped space with custom doors was once the exclusive domain of professional carpenters. Today, the landscape has changed. Thanks to online custom-cutting platforms and digital modeling, DIY enthusiasts can now design and assemble cabinetry that integrates flawlessly into their homes. Undertaking this kind of ambitious project maximizes every available square inch, freeing up other rooms while adding lasting aesthetic and organizational value to the main living area.
Key Takeaways
- Digital planning: Using 3D modeling software generates the millimeter-precise plans needed to navigate the complex slope of the stairs.
- Outsourced cutting: Ordering custom pre-cut wood reduces the need for heavy machinery and significantly streamlines the assembly process.
- Structural choices: MDF panels are the top choice for smooth, painted finishes, while plywood provides the necessary strength for load-bearing structures.
- Technical finishes: Carefully incorporating a 2mm clearance gap and installing stopper cleats ensures the longevity and smooth operation of cabinet doors.
When Digital Tools Simplify Custom Builds
Managing geometric constraints
Fitting a piece of furniture beneath a flight of stairs requires a level of mathematical precision far beyond that of assembling standard rectangular cabinets. Because of the staircase's incline, shelf depths vary significantly from one tier to the next, meaning the available space must be calculated meticulously before building an under-stair closet. This asymmetrical geometry makes taking manual measurements incredibly tricky. Every storage niche has unique dimensions. The slightest error in calculating an angle or estimating the depth of the final step will inevitably cascade through the entire structure, throwing off the final alignment of the doors.
From sketch to 3D plan
To overcome this technical hurdle, the design phase has largely gone digital, pushing the traditional folding ruler to the background. A simple paper concept sketch must be meticulously translated into a millimeter-accurate blueprint, with every board assigned a unique identification number to prevent confusion upon delivery. To safeguard this delicate step, 3D software like SketchUp or FreeCAD serves as a highly effective replacement for pen and paper. These digital tools allow DIYers to model the exact volume beneath the stairs, virtually test drawer placements, visualize complex panel intersections, and generate a flawless cut list ready to be sent to a machining center.
Streamlined assembly
DIY interior design is undergoing a major evolution: the complexity of a geometric shape no longer dictates the difficulty of building it. Specialized platforms now deliver wood straight to your door, cut down to the exact millimeter. The thickness and type of panel—whether MDF, plywood, OSB, or standard furniture board—can easily be selected based on the project's specific requirements. Once dreaded for its awkward angled cuts, the custom project now boils down to a methodical, logical assembly process.
Pantry, Office, or Built-In Storage? Types of Projects
Building under an existing structure
Before ordering materials, you need to define the structural and functional purpose of your space. DIY projects generally fall into two recurring categories. The first is a pantry built beneath an existing staircase. This pragmatic approach involves sliding storage modules, open shelving, or simple cabinets underneath the framing of the steps without altering the integrity of the building. The staircase structure remains completely independent and continues to bear the dynamic loads of daily foot traffic on its own.
Freestanding staircase furniture and multifunctional solutions
The second type of project is a bit more ambitious: the freestanding staircase closet. This is a fully functional staircase leading to an upper floor, but designed with built-in storage compartments seamlessly integrated into its base. This hybrid project demands superior mechanical integrity and secure, multi-point wall anchoring: the staircase must be fastened to the wall in a way that eliminates any risk of tipping.
Beyond simply storing supplies, optimizing the space under the steps can cleverly incorporate actual living areas tailored for remote work. Manufacturers note that an under-stair setup can be made multifunctional by combining a home office with built-in storage. To maintain a sleek room design and avoid cluttering the hallway when the workspace isn't in use, the desk can even be retractable, adding a modular dynamic to the home's interior architecture.
Materials and Assembly
Choosing your panels: MDF or Plywood
Carefully selecting your wood determines both the longevity of your custom furniture and its final visual appeal. When it comes to facades, MDF is highly versatile and exceptionally easy for amateur DIYers to work with. Belonging to the fiberboard family, this material is made from fine wood fibers compressed under high pressure with a binder. The major advantage of this industrial process is its perfectly uniform surface, which, once primed, takes beautifully to a matte or lacquered paint finish.
Conversely, if your design includes elements that require significant mechanical strength, plywood is the natural choice. This material is suitable for both decorative and purely structural purposes. Its multiple cross-glued veneer layers make the panel incredibly strong, offering remarkable resistance to bending and heavy loads. Moreover, its signature striped edges can be left exposed to give the piece a warm, contemporary feel. For a staircase-furniture hybrid that must support human weight, it is crucial to use wood with sufficient structural integrity, such as multiplex or Finnish plywood, and to rigorously verify the structure's load-bearing capacity.
Joinery techniques
To bind these different panels together permanently, four main assembly techniques stand out: simple screwing (which requires careful pre-drilling and subsequent filling with wood putty), metal angle brackets, classic wooden dowels (opting for special threaded screws or cam lock fasteners for MDF), and finally, biscuits joined with a biscuit joiner. The chosen method will depend directly on the required level of finish and how visible the joint will be inside the finished closet.
While dowel joinery yields a pristine result, purely mechanical solutions are still highly relevant. Angle brackets allow for quick screw assembly of panels: this practical solution is slightly less aesthetic and is therefore highly recommended for hidden constructions—typically an enclosed under-stair closet safely tucked out of sight.
The Art of Integration: Doors, Hinges, and Lighting Finishes
Tolerances and door adjustments
The most delicate phase of any custom build invariably lies in adjusting the facades. A millimeter-level miscalculation during ordering can quickly prevent a door from fully opening or cause it to rub against the adjacent frame. According to carpentry best practices, building an under-stair closet door requires measuring the opening precisely and, crucially, leaving a clearance gap of about 2mm on all sides so the door closes flawlessly. This minimal peripheral gap accommodates the wood's inevitable dimensional shifts, ensuring the concealed hinges operate smoothly through changing seasons.
Stopper cleats and lighting
To finalize the door mechanics and prevent them from pushing too far into the cabinet when closing, a robust physical stop is essential. The interior of a staircase closet should be finished with wooden battens (commonly known as stopper cleats) for the doors to rest against. This should be done just before permanently securing the door to its hinges and installing the front handles.
Finally, everyday practicality shouldn't be overlooked. The sloped configuration naturally creates deep shadows at the back of the cabinets. It is highly recommended to plan ahead for the necessary space and a dedicated electrical supply to install a fixed light source inside the under-stair unit. If running a hardwired cable to the home's electrical grid isn't an option, installing a battery-powered white LED strip is a brilliant workaround, allowing you to clearly see inside the closets and find your belongings in an instant.
Frequently Asked Questions (FAQ): Succeeding with Your Under-Stair Closet Project
Which panels should I choose for a utility space subjected to heavy wear and tear?
If aesthetics aren't your top priority—for instance, when storing tools or cleaning equipment under basement stairs—cutting platforms offer rugged industrial alternatives. Premium OSB (OSB/3 or OSB/4) or standard structural plywood are excellent choices for builds that will endure rough handling. They deliver superior mechanical strength without requiring meticulous painting and finishing work.
How can I avoid door alignment errors during the design phase?
The asymmetrical geometry beneath a staircase makes manual measurements notoriously difficult. The slightest error in calculating an angle or estimating the depth of the bottom step cascades through the entire structure, ruining the final alignment of the facades. Using 3D software is therefore essential for modeling the exact volume and virtually testing panel integration before placing your order.
Conclusion: From Spillover Storage to Centerpiece
Successfully integrating a storage space beneath the stairs transforms a residual volume—often written off as dead space—into a highly functional asset. Beyond the obvious gain in household storage, adding custom cabinetry profoundly alters the visual perception of the living area, smoothing out architectural quirks in favor of clean, structured lines. Over the long term, these tailored, permanent fixtures become a lasting organizational asset for modern homes, proving that every spatial constraint can be turned into an opportunity for optimization.