Corner Wardrobe in a Bedroom: How to Build One Yourself Using Standard Elements
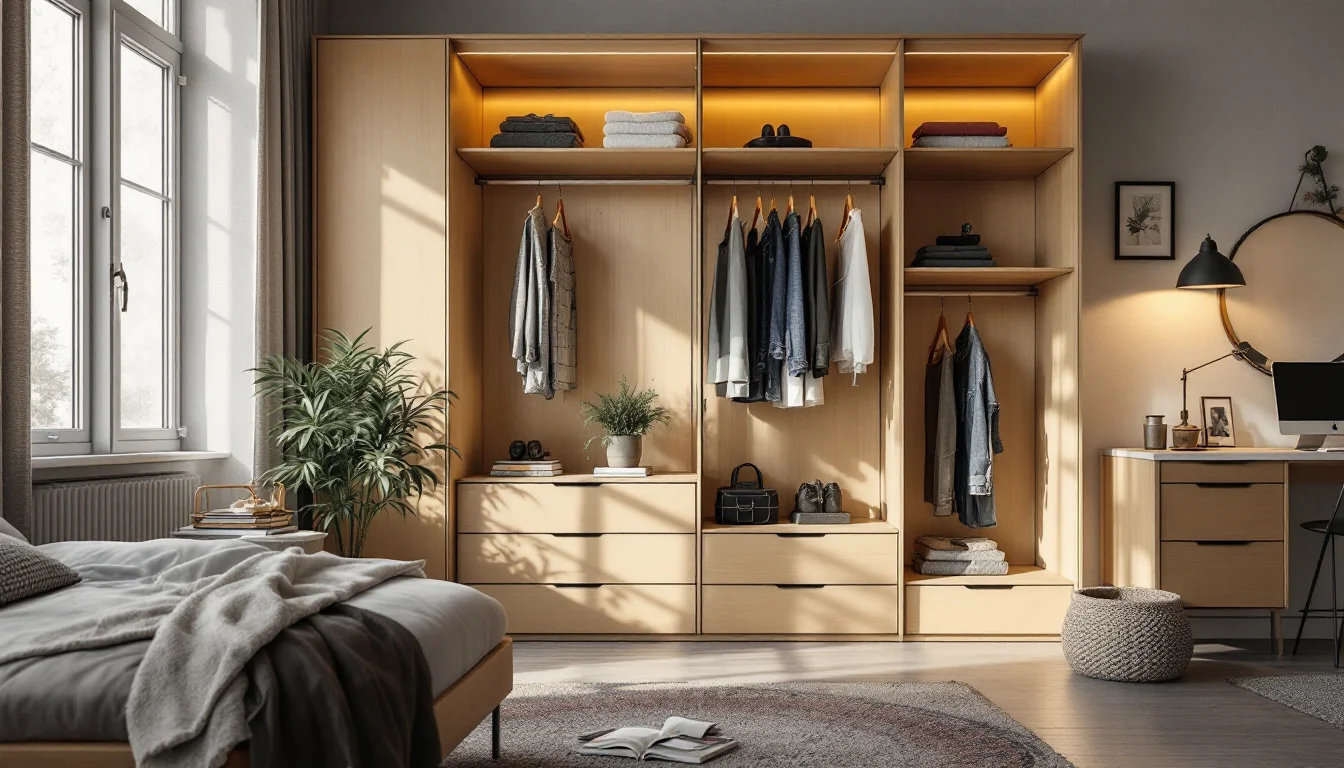
In a small bedroom, the corner closest to the window or the wall section beneath the roof slope almost always becomes a dead zone: a rarely used armchair, a stack of boxes, or simply empty space. Yet this same space can accommodate a complete wardrobe without calling in a manufacturer or spending the budget of a high-end custom-made piece of furniture.
The key isn't having the luck to own a spacious bedroom, but rather the method: choosing a configuration suited to the actual shape of the corner, assembling standard elements rather than having a unique piece custom-built, and having panels cut to the exact dimensions of the available space. This combination allows a DIY enthusiast to achieve millimeter-perfect precision comparable to professionally manufactured furniture, provided you handle the finishing and installation yourself, sloped walls included.
Key points to remember
Before breaking out the measuring tape, a few decisions will structure the entire project:
- Three configurations cover most bedroom corners: the open U-shaped wardrobe, the L-shaped wardrobe, and the wardrobe beneath a sloped ceiling for attic rooms.
- A functional wardrobe consists of combinable standard elements: shelves, drawers, a clothing rail, and, depending on needs, a clothes hoist.
- Wood panels can be cut to custom dimensions at millimeter precision, according to TOSIZE.be, which allows you to adapt the finished piece to the actual space rather than the other way around.
- Choosing the layout always comes before selecting interior elements: you sketch the volume first, then fill it.
Why is a bedroom corner ideal for a wardrobe?
A bedroom corner presents a specific problem for standard furniture: it's designed for straight walls, not for angles, recesses, or sloped surfaces. As a result, an off-the-shelf wardrobe almost always leaves unused space against the wall or beneath the roof slope.
The opposite principle involves designing the piece for the room, not the other way around. According to Maatkasten Online, a custom-designed wardrobe allows you to use every available centimeter, including sloped side or back walls. In other words, it's not the floor area that matters first, but the volume actually available once you account for wall irregularities—particularly the sloped sections found under rooflines.
A difficult corner is therefore not a handicap for this type of project: it's often the configuration that most justifies reclaiming storage space, since it's precisely there that standard furniture leaves the most unused volume.
What standard elements make up a functional wardrobe?
A wardrobe that works in daily life isn't just a shelf placed in a corner: it's a combination of standard elements, each serving a specific purpose. According to Maatkasten Online, the components that make a personalized wardrobe truly functional are:
- Shelves: for folded laundry, stacks of clothes, and accessories that won't be hung.
- Drawers: for underwear, socks, and small items you'd rather keep closed than on display.
- Clothing rail: for shirts, jackets, and trousers to hang.
- Clothes hoist: a mechanism that lowers the rail to shoulder height, particularly useful under a sloped ceiling where headroom is limited near the inclined wall.
These four elements aren't mutually exclusive: they generally combine across available width, with the highest or deepest areas reserved for shelves and drawers, and the most accessible area for the rail.
L-shaped, U-shaped, or sloped ceiling: which configuration to choose for a bedroom corner?
Once the custom-made principle is established—you choose the layout first, then add the elements that make the wardrobe functional, as Maatkasten Online reminds us—the question remains: what shape should the piece take? The three arrangements mentioned by the manufacturer each correspond to fairly different types of bedroom corners.
The L-shaped wardrobe
This is a configuration suited to a standard room corner without slope constraints. It exploits two perpendicular wall sections continuously, making it possible to distribute the rail, shelves, and drawers across two faces without creating inaccessible areas. It works well in a rectangular bedroom where a corner remains free after the bed is positioned.
The open U-shaped wardrobe
More demanding in floor space, the U closes off a small alcove on three sides. It makes sense when the bedroom already has a dedicated recess or sufficiently wide space, since it multiplies storage surfaces—and thus the ability to combine rail, shelves, and drawers without stacking them on a single wall.
The wardrobe beneath a sloped ceiling
This is a configuration designed for attic bedrooms. The lower part of the slope, too angled to hang clothes, lends itself mainly to deep drawers and shelves; the area where headroom becomes sufficient accommodates the rail, possibly paired with a clothes hoist to compensate for limited residual height.
Building it yourself: the custom-cut panel method
Once the configuration is chosen, there's the step that truly sets a DIY project apart from ready-to-assemble furniture: cutting panels to the exact dimensions of the corner. According to TOSIZE.be, wood and panels can be cut to custom dimensions at millimeter precision to create a built-in wardrobe that fits exactly into available space.
Regarding materials, TOSIZE.be cites three options suited to this type of project: MDF, plywood, and wood panels, described as durable, easy to work with, and providing a solid foundation for a DIY project. MDF lends itself well to smooth painted finishes, plywood offers better mechanical resistance for loaded shelves, and solid wood panels suit visible surfaces where appearance matters more.
As for timing, custom-cut panels are shipped within 3 business days according to TOSIZE.be's stated timeframes. This timeline deserves to be factored in during the job preparation phase: it separates the moment measurements are taken and the order placed from when actual assembly can begin. It's best to schedule this before dismantling anything in the bedroom, to avoid finding yourself with an immobilized room for several days without furniture or storage.
Custom-made wardrobe or DIY wardrobe: two ways to achieve millimeter precision
Facing an irregular bedroom corner, two paths allow precise adjustment, but they don't operate on the same principle.
The first involves having a professional custom-manufacture the entire wardrobe. Maatkasten Online indicates that many customers already have a custom wardrobe built this way—a claim communicated by the manufacturer itself, to be taken as an indicator of how widespread the practice is rather than as proof of quality. With this approach, millimeter precision is handled end-to-end: design, cutting, assembly, and installation.
The second path, DIY, relies on a different but equally precise mechanism: you have wood and panels cut to dimensions measured on-site, according to TOSIZE.be. This cutting precision provides a solid foundation for the finished piece's fit, but it doesn't eliminate the need to compensate on-site for wall or floor irregularities through shims, spacers, or touch-ups during assembly. The difference between the two paths therefore concerns mainly who assembles and installs. With the custom-made route, finishing and installation are handled by the professional; with DIY, they fall entirely to you once the panels arrive.
Concrete example: installing an L-shaped wardrobe in a small bedroom corner
To visualize the method, consider a simple practical case: a bedroom corner free after the bed is placed, forming a right angle between two walls, with no slope or particular constraints—a configuration that naturally points toward an L-shaped wardrobe.
The process follows a specific order:
- Measure the two wall sections forming the angle, noting any irregularities (baseboards, electrical outlets, radiators) that will reduce usable depth.
- Sketch the L-shaped layout before selecting interior elements, in keeping with the principle of layout first, elements second.
- Distribute standard elements across both faces: rail on the widest wall for hung clothes, shelves and drawers on the shorter wall.
- Order panel cuts to measured dimensions, then wait for the supplier's stated timeframe—3 business days at TOSIZE.be—before assembly can begin.
- Assemble the L-structure first, then fix functional elements one by one, checking plumb at each stage rather than at the end.
This sequence avoids the most common mistake on this type of job: ordering panels before finalizing the layout, which forces you to place another cutting order and lose the initial timeframe.
The true point of no return for a corner wardrobe project isn't when you sketch the layout in a notebook, but when you validate the panel-cutting order: until then, everything remains modifiable at little cost. Once that step is passed, subsequent decisions mainly concern interior lighting and façade finishes—two aspects worth thinking through once the main volume is in place rather than beforehand.