DIY Interior Design: How to Build a Custom Pegboard
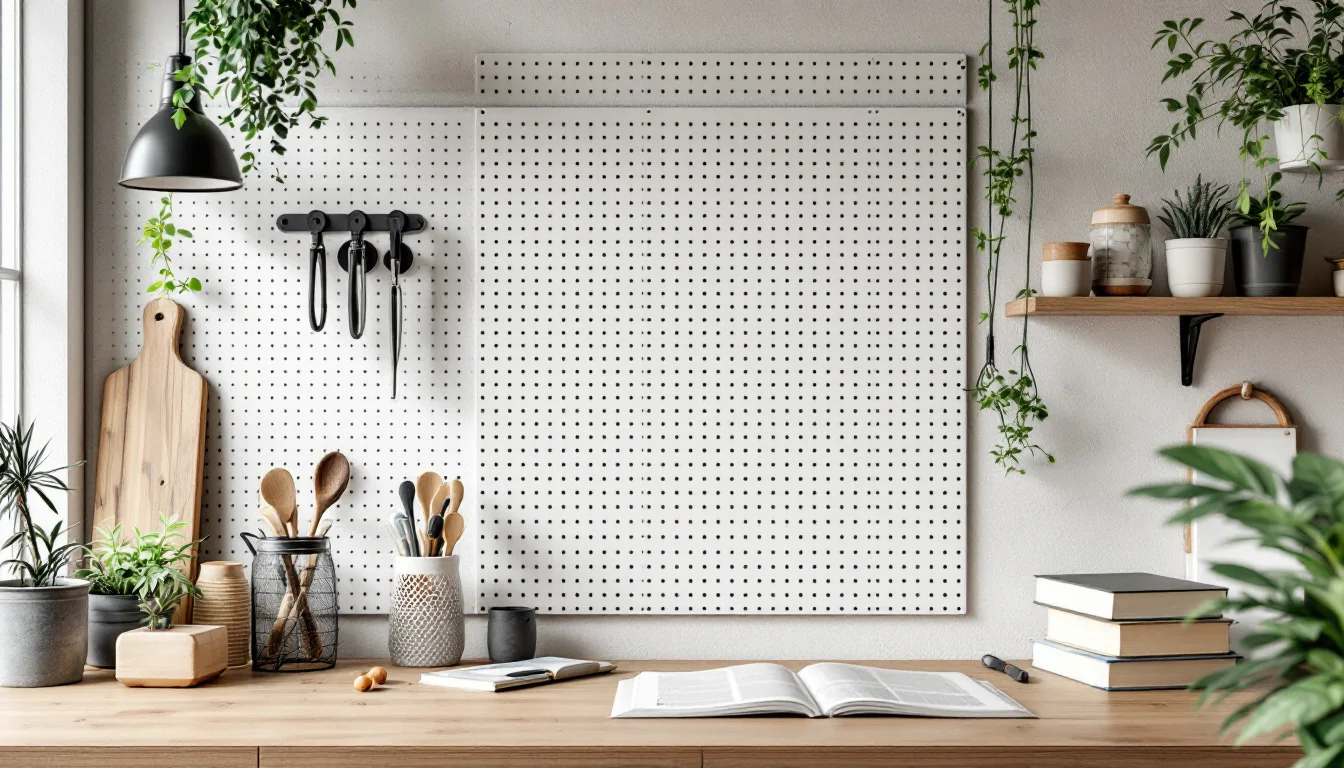
Originally, this setup was primarily found in garages and hardware stores for methodical tool storage. It was a purely utilitarian fixture. However, modern interior design has reinvented the pegboard: today, it has evolved into a playful, aesthetically pleasing decorative accessory, crafted in custom shapes and high-quality materials, all while retaining its primary organizational purpose.
The term stems from traditional carpentry and hardware vocabulary. As noted by the DIY and crafts fair Créations & savoir-faire, "peg" refers to a small wooden dowel or pin, and "board" speaks for itself—making the term quite literally describe a board fitted with pegs. Mechanically speaking, it is a surface perforated with evenly spaced holes, typically mounted to a wall. By inserting various accessories—like dowels, hooks, wire baskets, or shelves—you create a highly customizable wall-storage system.
However, bringing this fixture from the garage into the kitchen or living room requires careful planning. Building a structure capable of supporting heavy loads means paying close attention to material thickness and the distribution of the hardware.
Key Takeaways for This Project
- Material Selection: The relationship between the board's thickness, the peg diameter, and the suspended weight dictates the structural safety of the piece.
- Geometric Precision: Marking the center-to-center spacing and drilling require meticulous calculation to avoid compromising the wood's structural integrity.
- Spatial Modularity: Moving beyond the wall, the board can now be used to sculpt spaces as a freestanding partition.
What Are the Installation Options?
Before purchasing any materials, you must define the spatial role this unit will play in your room. While you can easily find ready-made, "turnkey" pegboards in home improvement stores, home decor shops, and online, building your own custom pegboard ensures it perfectly meets your needs. Installations generally fall into three main configurations.
The first configuration is the classic wall mount. By transferring the weight directly onto the walls of your home, this method frees up floor space entirely. It also offers a load-bearing capacity suitable for heavy dishware or dense tools, provided it is anchored into a solid support (like concrete, solid brick, or wall studs).
The second configuration explores room partitioning. The pegboard can step away from the wall to become a folding screen or room divider, using brackets as stabilizing feet. This option is great for visually dividing a studio apartment or carving out a private nook in a large bedroom.
Finally, the third approach prioritizes spatial flexibility. Freestanding, mobile pegboards on casters offer a dynamic alternative to wall mounting. These roving units are especially useful in modular work environments or collaborative workshops.
Installation Types Compared
| Structure Type | Primary Support Point | Mobility | Recommended Primary Use |
|---|---|---|---|
| Classic Wall Mount | Direct wall anchor | Fixed | Heavy loads (kitchen, workshop) |
| Room Divider | Floor brackets | Movable | Structuring open spaces |
| Freestanding Cart | Swivel casters | Full | Auxiliary storage or rolling cart |
Which Material and Thickness Should You Choose?
The technical success of a load-bearing board relies heavily on your choice of materials. Pegboards are generally made from a thick wooden board or a metal sheet. While metal offers excellent durability, wood (such as solid pine or structural plywood) allows for easy custom cutting and seamless integration into a home environment.
The materials required to build your own pegboard include a wooden board cut to your desired dimensions, wooden dowels, small planks to act as shelves, and a power drill. The board's thickness must be chosen based on what you plan to hang. For heavy items, it is absolutely essential to opt for a thick wooden board to minimize bowing.
Matching Your Drill Bits to Your Hardware
The choice of assembly hardware dictates the reliability of the piece. The dowel diameter should also be selected based on what you intend to hang. Thicker dowels will provide greater shear strength, making them far more resilient under heavy loads.
It is crucial to coordinate your tools with these hardware choices. You must equip your drill with a wood bit (ideally a Forstner bit for clean, crisp holes) that matches the exact diameter of your dowels. Mounting the board requires drilling into the wall with a bit suited to its material (such as a masonry bit for concrete or brick) to insert wall anchors, whereas the board itself is drilled using a wood bit. A word of caution: the type of anchor (expansion, hammer-in, or chemical) must be appropriate for your load-bearing wall (concrete, brick, or drywall). If you have any doubts about the wall material or the load it can bear, consult a professional.
How Far Apart Should You Drill the Holes?
The fabrication phase begins by defining the shape of the piece. While rectangular formats remain the industrial standard, contemporary woodworking allows for much more creativity. To give your pegboard a unique shape (such as waves or rounded edges), sketch the outline on the board, cut it out with a jigsaw, and sand the edges smooth to prevent splinters or sharp corners.
Calculating Center-to-Center Spacing
Marking the holes is done with a ruler at regular intervals, keeping the hole diameter in mind when measuring. It is fundamentally important to understand that your pencil marks represent the dead center of each hole, not the outer edge.
This geometric distinction is vital for load-bearing capacity. Let's look at a layout calculation example: if you set a center-to-center spacing of 5 centimeters between each mark, and you use a 2-centimeter diameter drill bit, the hole will eat up one centimeter on either side of the center point. The remaining material "bridge"—meaning the solid wood left between the edges of two adjacent holes—will therefore be 3 centimeters. If you make the mistake of enlarging the holes without adjusting the center-to-center spacing, this material bridge will shrink, significantly weakening the board's ability to support weight without cracking.
Executing the Drilling and Surface Finishes
Once your grid is finalized and marked out, drilling must be done perfectly perpendicular to the board. In addition to the storage grid, specific mounting holes must be drilled at the corners—as well as at intermediate points for large formats or heavy loads—so the board can be secured to the wall with anchor screws. This ensures the pull-out force is distributed evenly across the entire panel.
The mechanical finishing of the holes is an often-overlooked but essential step. You must sand both the front and back of the board after drilling. Pushing a spade bit through the panel inevitably causes wood fibers to splinter on the exit side (the back of the board). Meticulously sanding both sides ensures your dowels slide in without excessive friction and guarantees the back of the unit will sit perfectly flat against the wall.
How to Adapt the Pegboard for Any Room
Weight constraints vary drastically from one room to the next, which heavily influences how the board is used.
From the Kitchen to the Workshop
- The Kitchen: In this space, the accumulation of ceramics and cast iron generates heavy functional loads. It is imperative to use shelf brackets specifically designed to support the weight of stacked plates or pots. A collapse here wouldn't just destroy your dishes; it could also cause injury.
- The Workshop and Garage: Here, the panel returns to its industrial roots. It can cover a garage wall near the workbench, or be installed in a large format above your desk to keep tools, supplies, and raw materials organized, visible, and within arm's reach. Its adaptable nature also makes it a great display space for finished creations or a mood board for ongoing projects.
- The Entryway: The approach here becomes more ergonomic and compact. The pegboard acts as both a coat rack and a shelving unit. You can hang coats and accessories on the pegs, while small shelves can hold a mirror and a catch-all tray. Logically, the size should be tailored to the entryway to avoid disrupting foot traffic.
- Outdoor Spaces: Finally, this type of structure can be mounted in a garden shed to organize gardening tools (spades, rakes), or on a smaller scale on a patio or balcony. Just be sure to apply weatherproofing finishes (like moisture-resistant varnish or exterior wood stain) and choose a board or plywood graded for outdoor use.
What Finishes Should Be Applied Before Mounting?
Designing a system like this also invites graphic design considerations. Customizing your pegboard is best done before it is mounted to the wall, while the board is still lying flat on sawhorses.
Application techniques vary: spray paint ensures an even coat inside the drilled holes, while brush-painted motifs in various colors allow you to create striking contrasts. A smart trick is using painter's tape to block out specific zones, defining distinct storage functions. This visual zoning acts as an intuitive organizational map, showing you at a glance exactly where to store your cutting tools or hardware.
For a highly stylized finish, you can trace a quote or a pattern onto the board to turn it into a unique piece of wall art. If you are working with an extra-large panel, you can use a projector to cast the design for tracing, or spell out words letter-board style using colored pegs.
These open storage systems put all of our belongings on full display. Naturally, this transparency forces a rigorous curation process: it invites you to declutter your tools and keep only the items that are genuinely useful.