Building an Entryway Storage System from Scratch
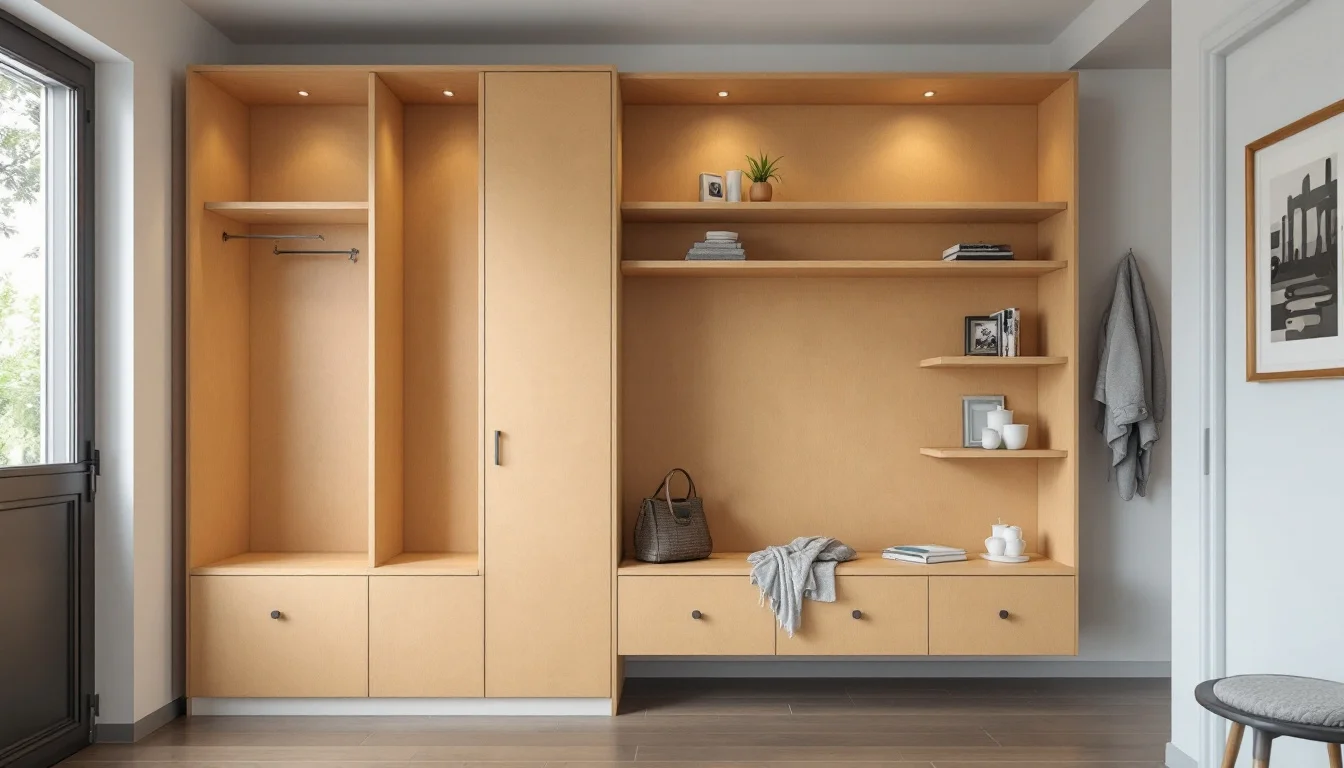
The entryway of a home is often the area subjected to the most daily wear and tear. Standard coat racks frequently end up buckling under the combined weight of stuffed backpacks, heavy winter coats, and gym bags. To build a setup capable of withstanding this chaos, an effective approach is to combine custom carpentry techniques for seating with the mounting engineering used for professional tool racks. In fact, the online custom-cut wood panel retailer TOSIZE cites entryway cabinets as one of the most common uses for their personalized storage furniture. The company highlights that this space is highly strategic, particularly for storing the vacuum cleaner and stray shoes. By blending the refined aesthetics of wooden cabinetry with the ruggedness of workshop equipment, this project aims to create a durable installation—provided the wall anchoring is perfectly executed.
Key Takeaways
- Spatial Analysis: Visualizing dimensions with masking tape to anticipate the footprint.
- Hanging Ergonomics: A strict separation between heavy items hung on the wall and small accessories stored in bins.
- Hybrid Carpentry: Using MDF for the fixed structure and plywood for high-wear areas.
- Angled Drilling: Drilling at a tilt to create highly durable peg hooks.
- Wall Anchoring: Mounting on battens to distribute the dynamic load across the masonry.
Step 1: How to Design and Evaluate Your Entryway Space
Evaluating Volume and Space
The first phase of the project demands a rigorous assessment of your room's geometry. Before drawing up plans for your build, you need to decide whether the furniture will be built-in or freestanding. If recessing it into an alcove or between two walls, you must measure the available space precisely, keeping in mind that existing walls are rarely perfectly plumb. To avoid unpleasant surprises during assembly, it's best to take action during the sketching phase. Simply tape out the furniture's exterior dimensions on the wall using painter's tape. This will help you visualize the actual footprint it will occupy in the hallway.
Applying Workshop Ergonomics to the Home
Organizing a functional entryway follows the same physical laws as setting up a workshop. In one of its layout tutorials, tool manufacturer STIHL points out that not all tools should be hung up. Smaller accessories (handheld hedge clippers, small rakes, trowels) can be stored on a shelf, while spades, rakes, brooms, and larger tools need to be suspended. Translated to a family setting, this rule means heavy coats and backpacks should hang on the wall panel. Storage bins, on the other hand, should be reserved for gloves, scarves, and keys.
Rules for Hanging
For the upper section of the installation, a basic hanging rule applies: items should be hung vertically or horizontally, kept off the ground, and placed out of reach of children and pets. Furthermore, it should be possible to unhook the item with just one hand. This last point is crucial for an entryway. A piece of clothing or a bag must be easy to grab in a single, fluid motion as you leave the house, without the hook wobbling or hindering the movement.
Step 2: How to Build a Custom Entryway Bench
The Main Structure of the Furniture
The lower section of the setup revolves around creating sturdy seating. Among the possible layouts for a mudroom unit, you will often find a storage module designed as a bench cabinet that doubles as a seat. This perfectly aligns with our concept of a built-in entryway bench. When fabricating this structure, material selection is key. MDF is often described as one of the most versatile panel materials available: it is easy to work with and boasts the advantage of not splintering. However, for an entryway, you must consider its susceptibility to moisture, its heavier weight compared to plywood, and its poor edge-screw holding power. Depending on the desired finish, it's available raw, primed for painting, polished, or even dyed black.
Assembly and Aesthetics
The structural integrity heavily relies on the quality of its joints. The boards can be assembled using screws. This technique is often combined with wood glue or replaced entirely by corner brackets. For those seeking a flawless finish with no visible hardware, miter cuts can be used to create hidden joints. This gives the bench a highly elegant, seamless monolithic appearance.
Lower Mobile Storage
The area underneath the bench is designated for damp, muddy shoes, requiring a material far more resilient than standard MDF. Plywood is a versatile and easily workable material. It's ideal for storage furniture and, crucially, is available with a melamine coating. This melamine surface makes cleaning a breeze. To optimize functionality, we can take a cue from a highly practical design: wooden storage bins on casters. In this approach, a method can be devised so that no screws are visible from the outside. These rolling drawers glide effortlessly under the bench, hiding the clutter while remaining easy to pull out.
Step 3: How to Build a Sturdy Coat Rack with Angled Pegs
Required Materials
To design a coat rack capable of supporting significant weight, we are ditching screw-on metal hooks in favor of a heavy-duty wooden peg system. For a horizontal wall-mounted peg rack, you can start with a solid hardwood board, two angled wedges, and round dowels (such as beechwood). The thickness of the board contributes to its rigidity under the sheer weight of winter gear.
Angling the Pegs
The mechanical efficiency of this rack relies on a simple yet ingenious concept. To angle the pegs, the procedure involves resting the board on wedges to give it an optimal tilt based on the type of items being hung (usually between 5 and 15 degrees). By drilling straight down perpendicular to the workbench, the resulting holes will be angled relative to the board. Consequently, the pegs will point upward once the board is mounted, effectively securing hanging items like coats and backpacks. While glue isn't strictly necessary—as tightly fitted dowels will hold themselves in place—a dab of wood glue is highly recommended for heavy loads to prevent them from loosening over time.
Calculating the Optimal Spacing
The placement of the pegs shouldn't be left to chance. The center-to-center spacing of the holes directly depends on the type and bulkiness of the items you plan to hang. You can opt for a tighter spacing between holes, but only for narrow items. In our entryway setup, this condensed spacing works well for the area dedicated to light jackets or scarves. Conversely, for broader items, a much wider gap between drilled holes is necessary to prevent overlapping. On our coat rack, this wider distance will be reserved for bulky winter coats and backpacks.
Step 4: How to Securely Mount a Heavy Coat Rack to the Wall
Safe Component Preparation
Before moving on to the final installation on the entryway wall, the prep phase in your workshop or garage requires precision. Let’s recall an essential rule: ensure all pieces are securely clamped to the workbench before drilling any screw holes. This preliminary step makes driving screws easier and prevents the wood from splitting. Such precautions are especially vital when working with panels destined to endure significant pull-out forces.
The Batten Mounting Technique
Mounting a heavy panel directly into plaster or drywall is a common mistake. To guarantee the system holds up when someone yanks their coat off the hook, you must use a substructure. The vertical support is assembled by first attaching battens (cleats) to the wall, then securing the boards laterally to these battens. In a standard setup, the two boards are spaced 146 cm apart. This cleat method allows you to hit solid anchor points in the masonry or wall studs, evenly distributing the weight of the hook rack.
Load Stresses and Choosing the Right Anchors
The interface between the battens and the wall dictates the maximum load capacity of the entire furniture piece. It should be noted that the gauge of your wall anchors depends entirely on your wall's characteristics. You may need heavier-duty anchors for crumbly or older walls, so don't hesitate to oversize your mounting hardware. It is also worth noting that tackling a build like this is no trivial task: it requires specific tools and a solid time commitment.
Frequently Asked Questions: How to Successfully Build DIY Entryway Wall Storage
What tools are required to tackle this project?
The basic toolkit for building custom storage furniture includes graph paper, a pencil, an eraser, and a ruler for the design phase. For the actual construction, you will need a cordless drill, wood glue, primer and varnish, sandpaper, a tape measure or folding rule, a spirit level, and appropriate wood screws.
How do you successfully drill holes in the coat rack board?
The technique relies on using angled wedges to tilt the board at an optimal angle of between 5 and 15 degrees. By then drilling straight down, perpendicular to the workbench, you ensure perfectly angled holes. As for the center-to-center spacing (the distance between holes), it must be rigorously calculated based on the bulk of the items being hung to prevent any overlapping.
Is it a good idea to reduce the space between hooks to save room?
It is a common temptation, but taking this approach is highly discouraged. Drilling holes closer together is only recommended if you are absolutely certain you'll only be hanging narrow items. If you pack the beechwood dowels too tightly, the rack will become useless for bulkier items. In an entryway context, winter coats would end up stacked on top of each other, making them impossible to grab easily.
Conclusion: What Are the Benefits of a Well-Organized Entryway?
Beyond sheer aesthetics, building this storage setup yourself transforms the daily experience of leaving and returning home. Importing raw workshop engineering into the mudroom proves that successful design relies first and foremost on a precise understanding of the mechanical forces at play. Although this project demands an investment of time and tools, the structural stability of a solidly anchored piece of furniture goes a long way in cutting down the clutter in this high-traffic drop zone.